Things I needed to do yesterday:
1. Laundry-drawers are getting empty and hamper is full
2. Shopping for food, birthday and shower gifts for this weekend
3. Organize fabric in my office so I can finish 4 new patterns I've been working on.
3. Organize fabric in my office so I can finish 4 new patterns I've been working on.
4. Deadhead the roses so I can get the cuttings in the trash tomorrow.
5. Clean the floors...kinda sticky.
6. Work on training the new puppy
7. Clean out the inside of my car.
7. Clean out the inside of my car.
But what do I do instead? Well of course I make a Super hero cape for my 3 year old grandson, Asher! And a pink one for his sister, 2 year old Harper.
Glad I have my priorities straight!
I decided to make a quick tutorial to share with you, but beware- with a cape on little boys suddenly have the urge to jump off whatever they can climb onto!
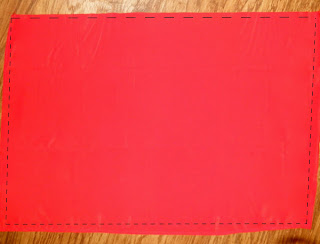
Cut out two rectangles- one 36 inches wide x 23 inches long,
another 18 inches long x 3 inches for the tie.
Fold up raw edges of both short sides and one long side (now the bottom) 1/8 of an inch and then 1/4 of an inch and hem, hiding raw edge. Across the unhemmed top make a basting or gathering stitch.
Pull gathering stitch until the top is gathered, evenly spaced to be 8 inches across.
Pin top gathered edge to small rectangle(neck piece) right sides together so the raw, gathered edge is even with the top edge of the neck piece, with 4 inches on one side and 6 inches on the other side.
Fold up neck piece lengthwise so that the right sides are together and sew-stopping when you get to the gathered cape piece.
Turn neck piece ends right side out.
Fold up neck piece lengthwise so that the right sides are together and sew-stopping when you get to the gathered cape piece.
This is what it should look like now.
Trim seam allowance on neck piece.
Turn neck piece ends right side out.
Fold neck piece center down to cover seam allowance made when attaching neck piece to cape. Pin and sew it down, either by hand or by machine.
Sew velcro pieces onto neck piece ends with the soft side on the inside of the longer end of neck piece and the roughside of the velcro on the outside of the shorter end. Don’t use the super firm grip velcro because you want it to release if pulled rather than choke them!
Add logo if you like, or an initial.
We haven’t decided if he is going to be:
Superman
the "Itsy Bitsy" Spiderman
or just Super Asher.


3 comments:
We have the same to do list & accomplished the same amount over the weekend. What I did instead, cut out fabric for 3 different patterns! Gotta love it though, right?!!!
Can't wait to see/buy your new patterns :)
so fun ... my son would love that ... if i only i could sew!
I just want to say Thank You for your great patterns and blog:):)I started sewing about a year ago. The Harper and Kate patterns were the first patterns I purchased over the internet. I too was completely lost with Simplicity, Butterick, etc. patterns. I taught myself to sew with the help of the great tutorials on the world wide web. I have tried a number of 'internet' patterns and I have to tell you I am back at Sew Sweet Patterns. I love your patterns.!!! Thanks for all the time you spend helping newbies like me:)
Post a Comment