Tuesday, June 28, 2011

Fourth of July Favorites!

Around here we love the 4th of July!  We all pack up and head to our little cabin up in the little town of Green Valley Lake.   We dress up the kids {and dads, whether they like it or not} and they walk and ride bikes in the sweet parade.  We all sit around the lake afterwards and have a BBQ and play games.
It is like a serious time warp. 
Since it also, my mom's birthday {on the 3rd}, my sister and I are planning the food and fun for the rest of the weekend.  I have been looking around for some inspiration.  I thought I would share my favorites with you!  I am dreaming if I think I will get all one of these actually done, but I can try, right?  

Source: thelongthread.com via tipnut.com
Source: marthastewart.com
Source: blog.hgtv.com
Source:  julytipjunkie.com
Source: funkyvintagekitchenblog.com
 
Source: thecraftychicks.com


So that is what we are up to for the 4th!
What are your plans?

Saturday, June 25, 2011

We have a Winner!


Congrats Christy T!!
Send us an email here and tell us which 5 patterns you would like us to send you!

I am off to work like crazy to get the new Ruffled Skirt finished!  
By the way, this skirt needs a name!  
So far we have the "Happy Skirt" and the "Sassy Skirt."  
We need an adjective for this new skirt.  
Leave a comment here with your ideas.  
If we pick yours, we will send you the pattern for free
(when we finish it of course!).

Tuesday, June 21, 2011

100th Follower Pattern Giveaway!

Woohoo!  We have our 100th follower!  Thank you WinnieL!  

We are so thankful for all of your support and feedback as we are starting this blog that we are doing another pattern giveaway!

So how does a FIVE pack of the child patterns of your choice sound?

To enter you must be a public follower of our blog and leave a comment telling us one of the patterns you would pick, who you would make it for, what fabric you would use and who you would make it for!

That's it!

Giveaway will close Friday night at 12pm PST.

Thank you again for "following" us!

Wednesday, June 15, 2011

What we are working on Wednesday!

Happy Wednesday!

Ever feel like you just need to stop and getaway?  

My husband, Peter, had the busiest teaching year EVER, so we decided that right when school got out to drop everything and just get away!   I work on an on-call basis at our Ritz-Carlton here in Laguna Niguel, which gives me a pretty fabulous employee rate, so we booked a few days up in San Francisco at the Nob Hill Ritz!!  We somehow talked my mom and dad into coming along with us and they even agreed to watch the kids for one of the nights so we could have a date night! 

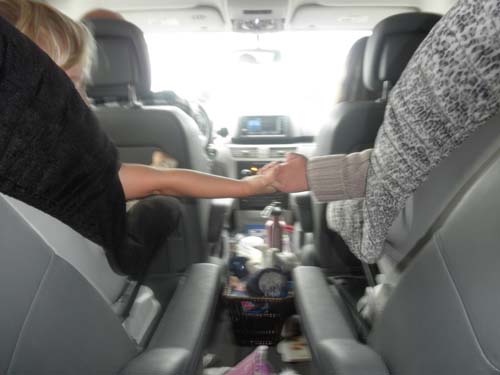
We packed into our mini-van.
{my parents sat in the WAY back - it was like a total role reversal!}
Thankfully, our kids are actually really great in the car!

We were total tourists the entire weekend!  
Maverick's - Peter got to show us the spot he dares to surf once in a while!

We almost blew away at the Golden Gate Bridge Lookout Spot!

Relaxed at The Beach Chalet with live music & lots of dogs so Harper was a happy girl!

Rode the Carousel!

Met "Captain Hook" - Asher is currently totally into Peter Pan!

 Got to spend lots of fun time with Captain!

 Played in a windmill!

 It was so nice to have Peter around for the whole weekend!

Asher LOVED the cable cars! 
{Gogo & Captain even bought him one - and yes, I said "Gogo & Captain"}

Despite the 14 hour trip home (we took Highway 1), we had a wonderful time!

 The Nob Hill Ritz is dreamy and the city is absolutely magical! 

But now it is time to get back to work!

This Wednesday, we are working hard to get the new ruffled skirt FINALLY finished!  We also have a one-shoulder, ruffle dress in the works, a new wrap dress with capped sleeves and a pleated bodice dress with a fun "twist" for the closure!

The Kylie Doll Dress and Doll Ruffle Pants are coming very soon as well!

Oh and a giveaway is in the works too!


Wednesday, May 25, 2011

What we are working on Wednesday!

Two new patterns hitting the shop & website TONIGHT - The Amelya Dress & Lily Halter Dress!
You have to wait until they go up to see those though! 

But we will show you the new SKIRT that we are working on!  
We are hoping to have it up by the end of the weekend!


Yes, it takes TWO lollipops to get Harper to smile even for one of her favorite people, Kaylee!
(Kaylee is our super fabulous photographer who you can find here).  

So that is what is the works right now! 
If you would like to stop by and entertain my kiddos so I can finish sooner, I would not turn you down!

Sunday, May 22, 2011

We have a winner!

According to random.org...

Andi

is the winner of the StitchnStash Fabric Giveaway!

Congratulations!!

Please message me at sewsweetpatterns@gmail.com and I will forward your info to Julie at StitchnStash!

And of course, we would LOVE to see pictures of what you make!

Friday, May 20, 2011

Pillowcase Dress Tutorial!

If you are like us, you seem to have a stash of  pillowcases that you have somehow collected over the years.   We have been giving some of our favorite cases a new life lately by turning them into dresses (mostly for Harper...we need some more girls in this family!)  So we thought we would share a little tutorial with you for these sweet Pillowcase Dresses.


First you need to download the {free} pattern by clicking here.

Once you have downloaded it and cut out the desired size, we recommend you read over all directions before you getting started.  Here are the steps:

1.  Start with a pillowcase-it doesn’t matter what size.

2.  Iron it flat, then cut off the top 1/2 inch.

3.  Fold so the front center is now the right edge. 

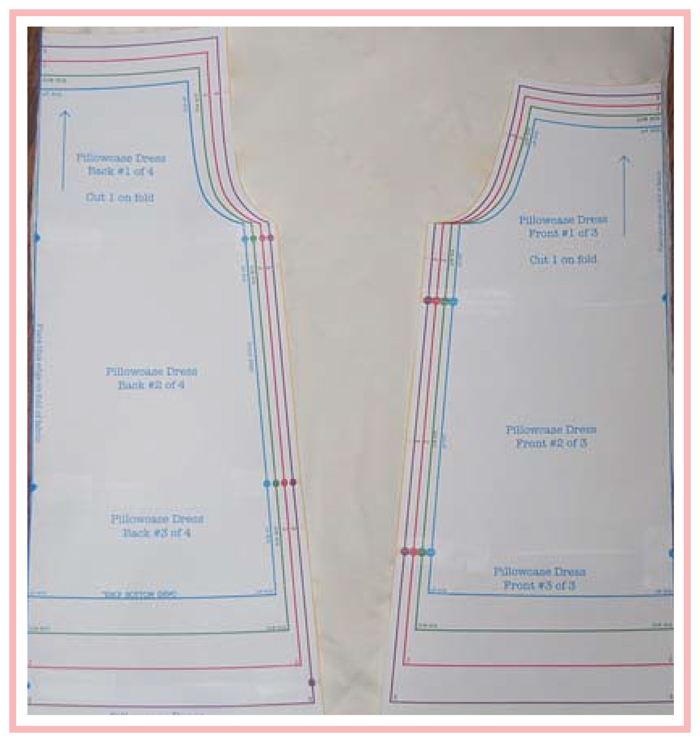
4.  Place front pattern piece so the center front is on the decorative front part of the pillowcase.
The back pattern piece center front should be on the opposite fold.

5. This is what the pieces should look like after cut and unfolded. 

6.  Put right sides together so the inside is now the outside and sew together
at sides with a 1/2 inch seam allowance

7.  Trim seam allowance to 1/4 inch and finish with a zig zag or finishing stitch.  

8.  Turn raw edge of armhole under 1/8 inch and then 1/4 inch and topstitch.
Take it slowly to keep it smooth and even.

 9.  Another picture showing what the armhole should look like.

10.  Fold raw edge of the neckline down 1/8 inch and then 
1 inch and topstitch, creating casings for the ribbon.

11.  Pull ribbon through the casings, with ends meeting on one side. I use a loop turner
to pull it through, but you can attach a safety pin to and feed it through.

12.  You are finished!!

There you go!  Your sweet pillowcase has a happy, new purpose! 
 

© 2011. All Rights Reserved. | Custom Blog Design By Penny Lane Designs